Finding a Sandbox
In this tutorial, we will guide you through the steps to make a prim drivable in the Second Life virtual world, turning objects into interactive, functional vehicles. The journey begins by finding a suitable location for your creative process, ideally a sandbox. Sandboxes in Second Life are designated areas where users are free to build and script without affecting the main areas, providing a perfect environment for experimentation and development. Teleport to one of the following sandboxes to begin building your car!
Sandbox locations:
Setting Up Your Car Prim
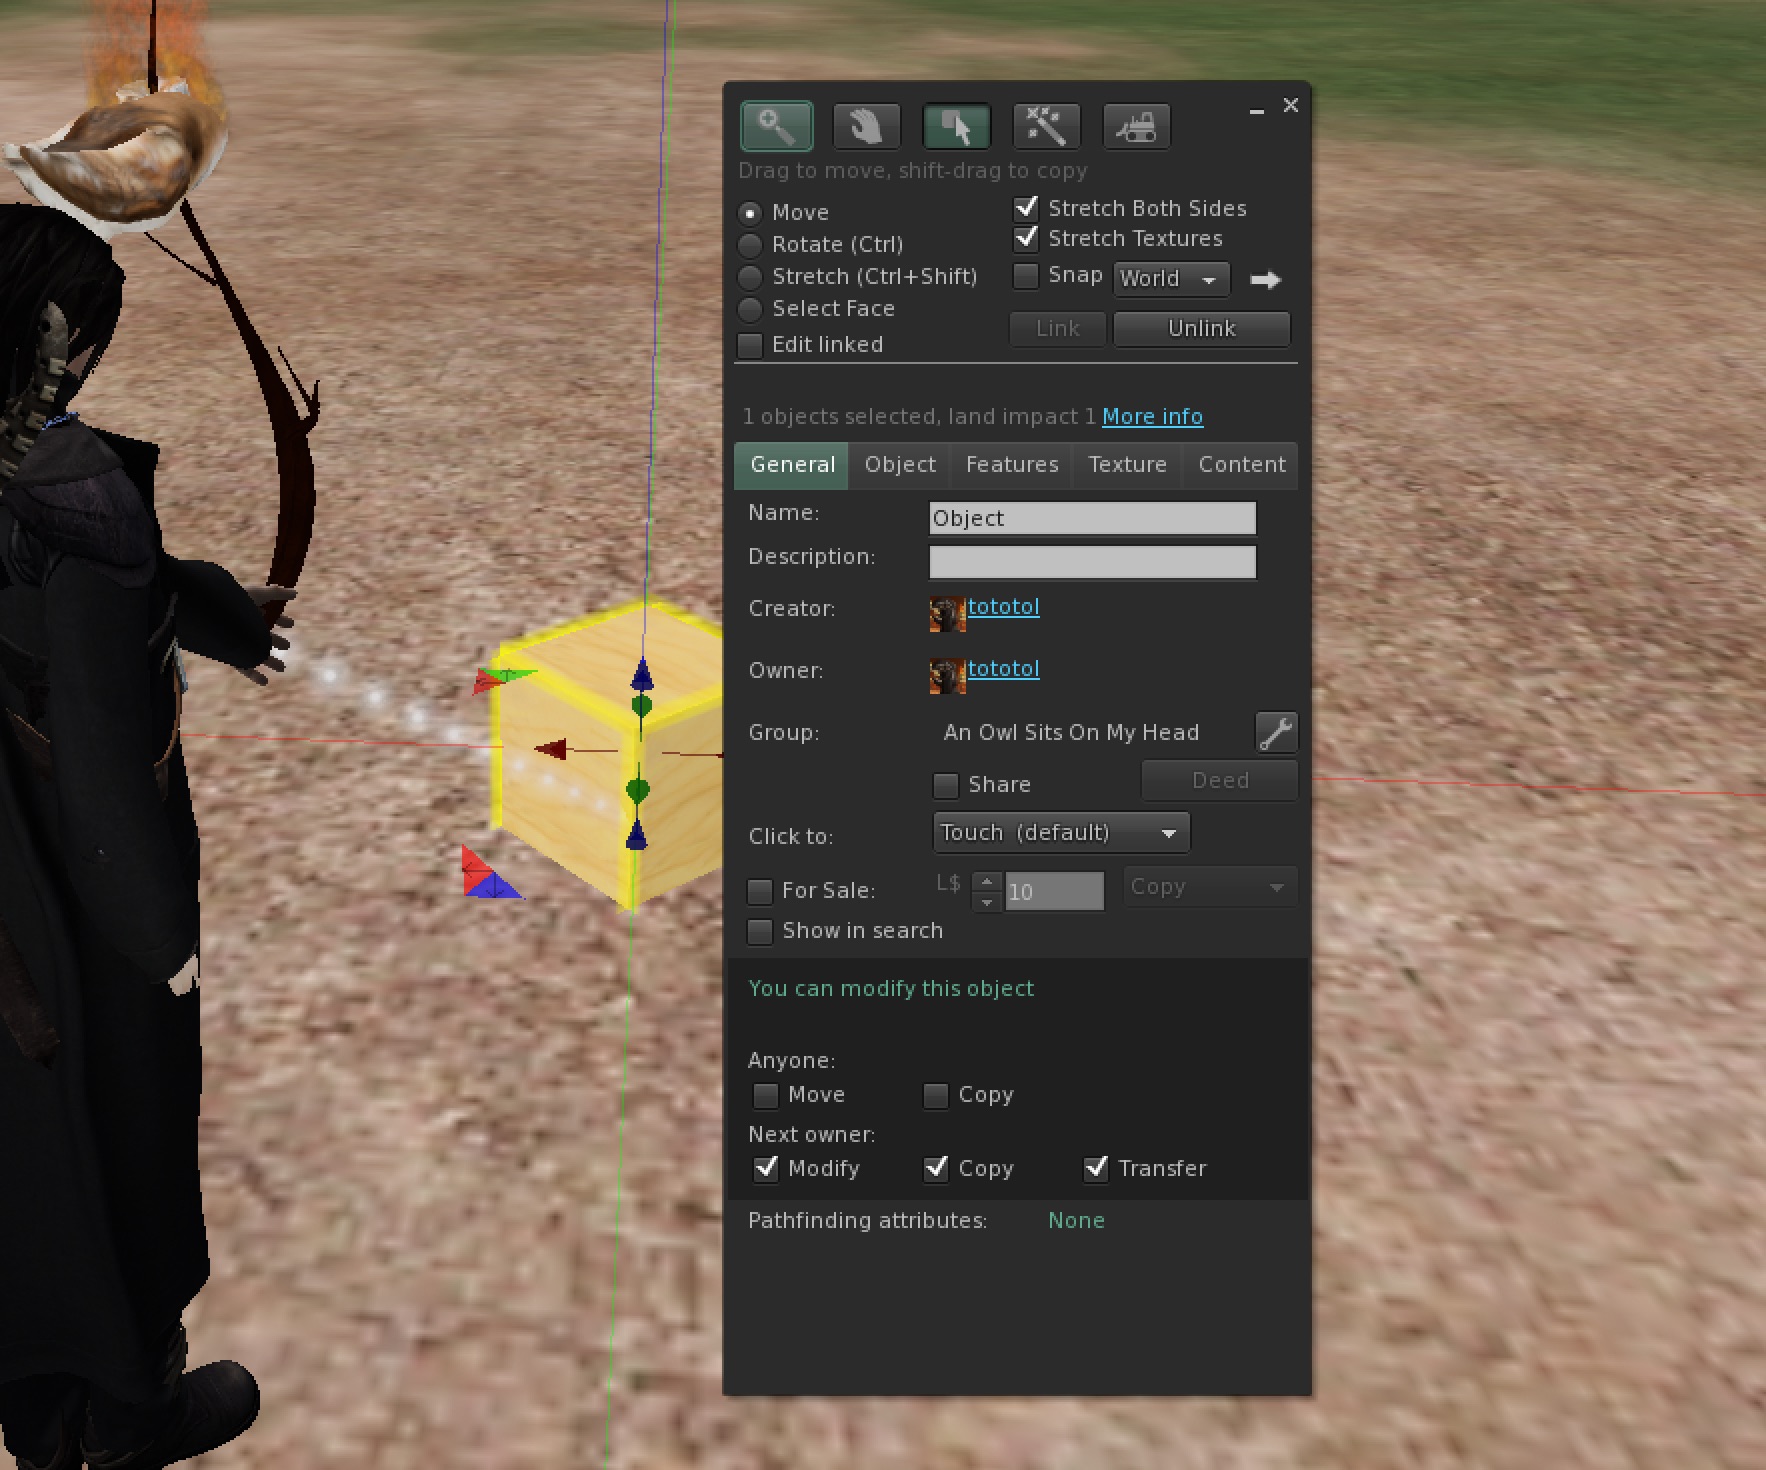
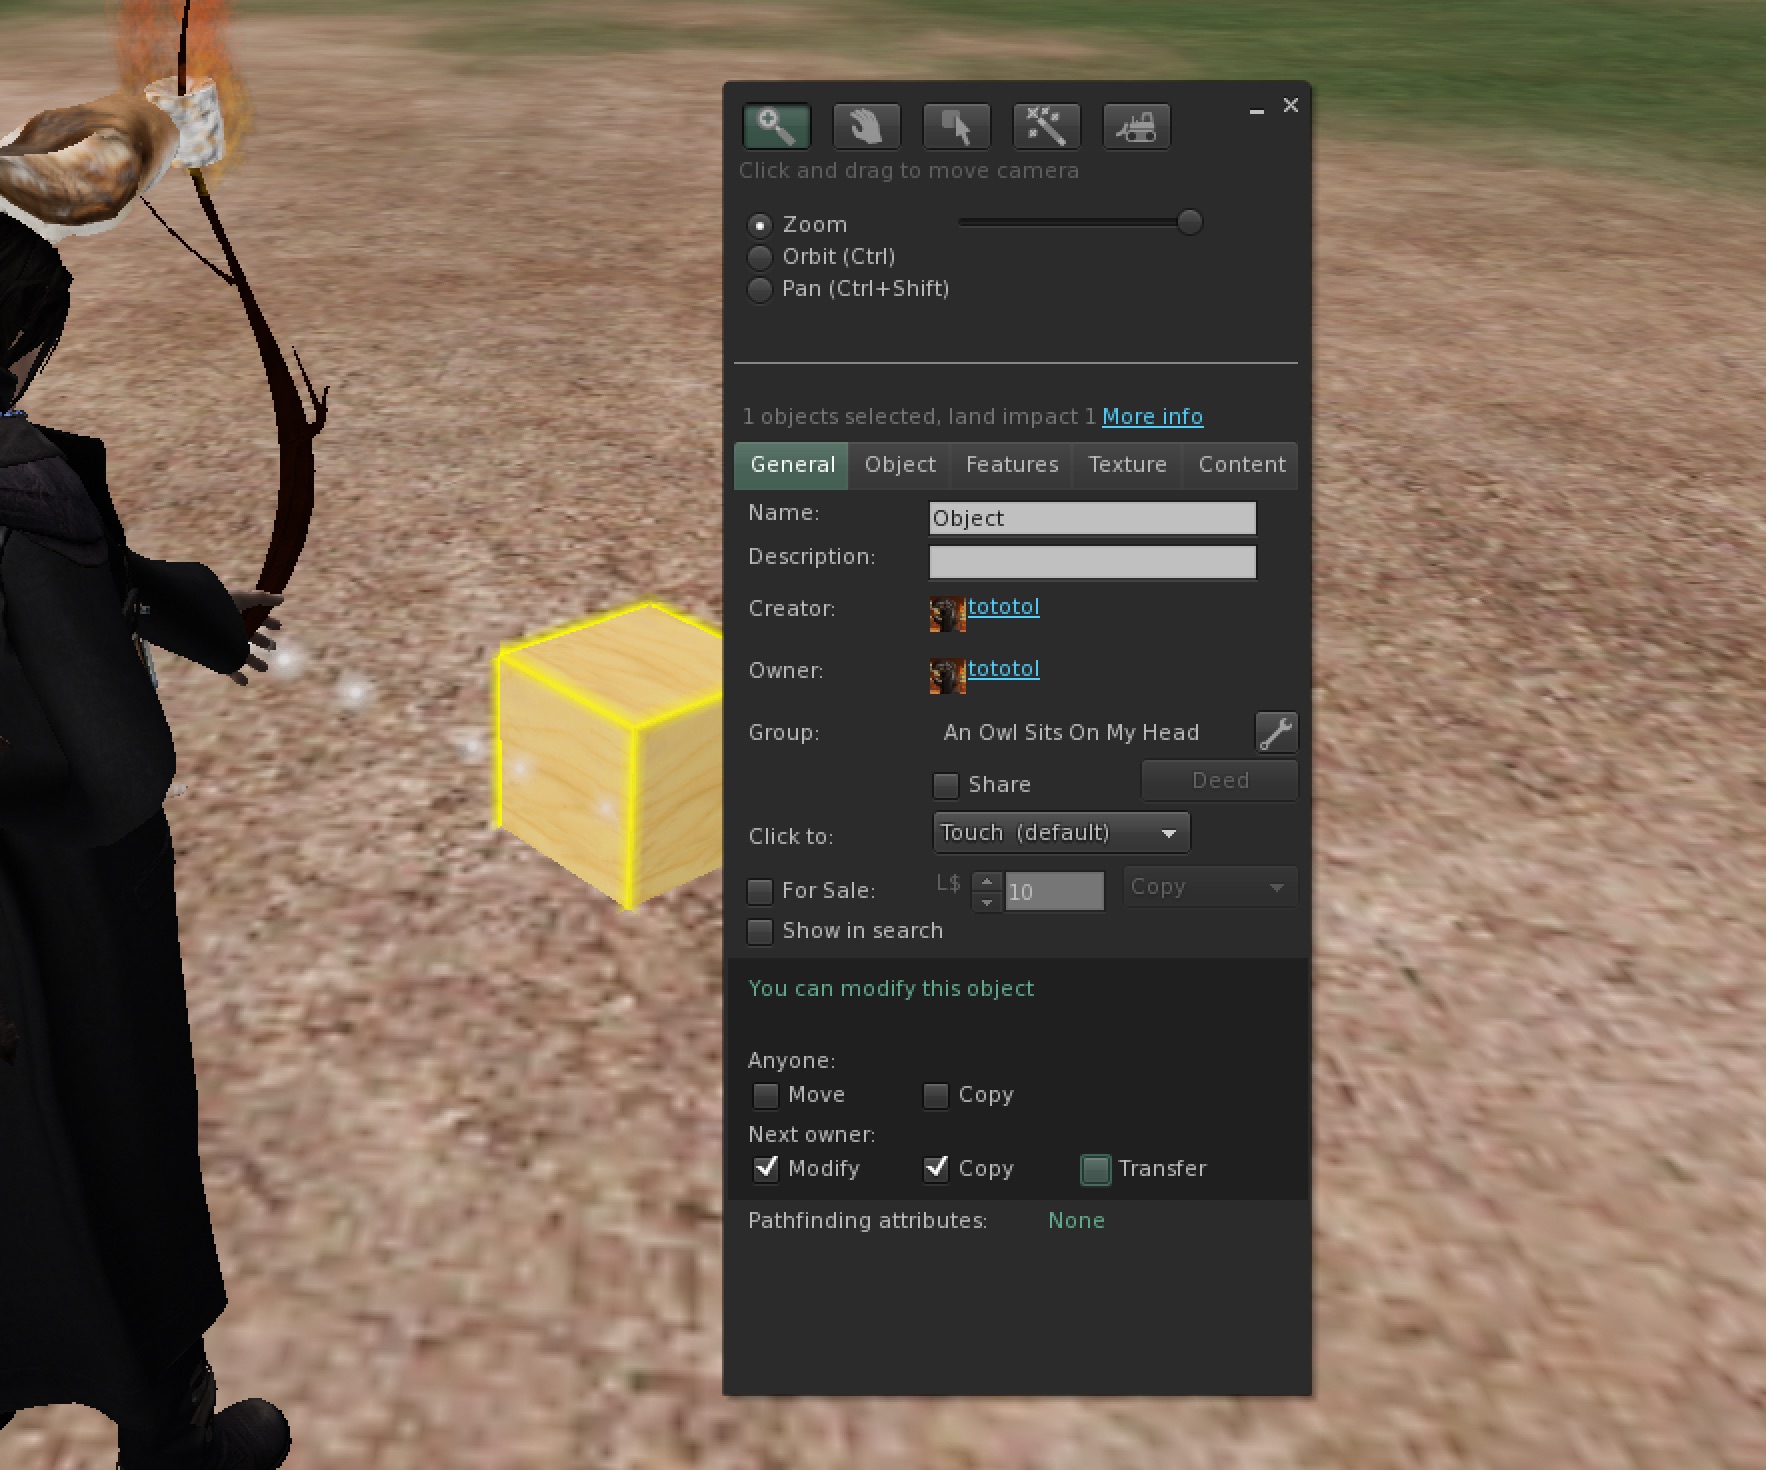
Once you've teleported to your sandbox, the next step involves utilizing Linden Scripting Language (LSL) to bring your prim to life. Copy the LSL script from this tutorial and be ready to put it into a new script in Second Life.
Next, rez a prim and create a new script inside of the prim
Rezzing is the process of creating or making an object appear in Second Life. This can be done by right-clicking on the ground and selecting "Create" or "Build," leading you to the object creation menu. Choose a simple shape for your prim; this will serve as the base of your vehicle.
Test Drive
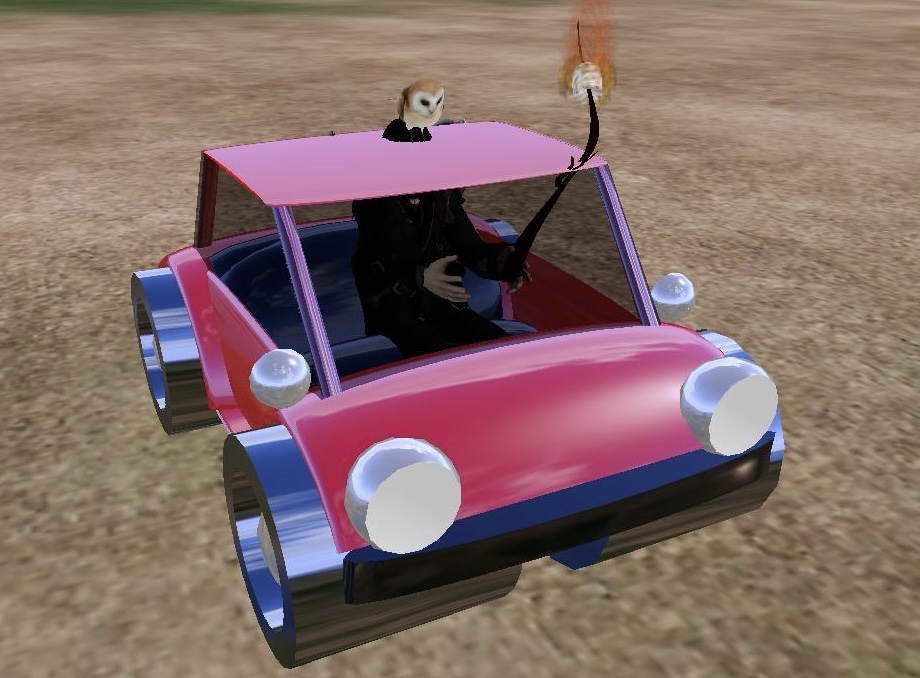
After you've pasted the script into the prim's inventory, the next step is to try driving. This part is fun because you get to see how your project works. Simply right-click on the prim and choose "Jump In!" Press the arrow keys or "WASD" to move and control your vehicle around the sandbox. This test drive is important because it shows you how your vehicle moves and responds, giving you a chance to see what might need to be fixed or changed. It's a big step in making your drivable car in Second Life, connecting the work you've done with a real experience of driving it.
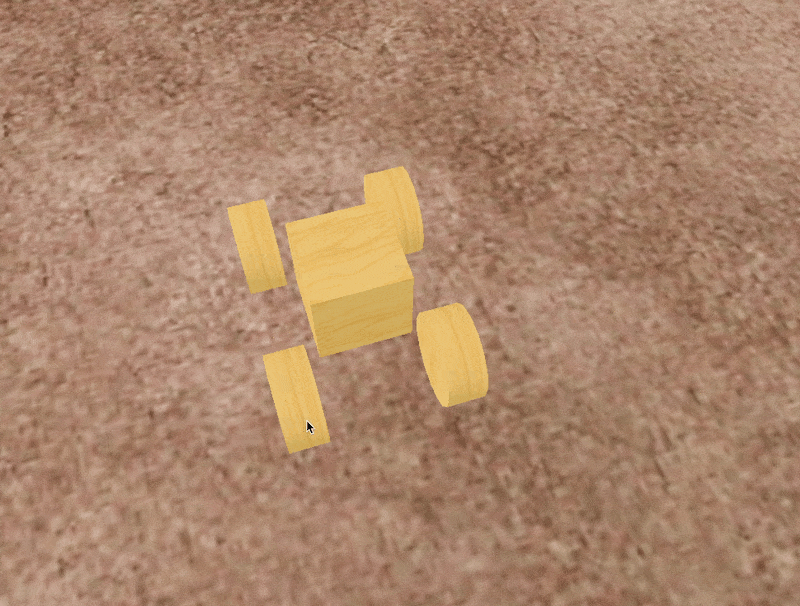
To prevent your car from tipping over easily, it's crucial to consider the base size of the prim you're using. A narrow base, such as one with a width of only 0.5 meters, can make the vehicle unstable and prone to tipping. To enhance stability, you should increase the size of your prim, particularly its width and length (X and Y dimensions).
Here’s how you can adjust the size to prevent tipping:
- Select your prim in edit mode.
- In the object size section, find the X (width) and Y (length) dimension settings.
- Increase these dimensions to create a broader and longer base. A good starting point is to make the prim at least 2 meters wide and long, but you may need to adjust this based on your specific vehicle design and performance needs.
Experiment with different sizes to find the perfect balance between stability and the aesthetic you want for your vehicle.
Going Faster
Now that you've got the basics of controlling your vehicle, let's make things a bit more exciting by talking about how to adjust how fast your vehicle goes. You'll need to tweak some settings in the script. Inside the script of the car, there are variables. These variables act like dials and switches for different parts of your car, including its speed. By changing these variables, you can make your car go faster or slower, just like adjusting the speed on a real car.
It's a simple process: find the variable in the script that controls speed, and then change the number on the right side of the equal sign before the semicolon. Higher numbers will make your car speed up, while lower numbers will slow it down.

Remember, changing speeds isn't just about going fast; it's about finding the perfect balance for your vehicle so that it's fun to drive and still easy to control. If your car goes too fast, it might go through walls and get stuck inside. So, take your time to experiment with different settings until you find the speed that feels right for you.
Moving forward, let's delve into how you can share your car with friends and further customize it, making it a unqiue creation in Second Life.
Sharing Your Car with Friends
Sharing your creations can be one of the most rewarding parts of Second Life. If you want your friends to be able to re-share your car and even make their own customizations, you should make your car 'full perm'. Full perm means giving full permissions: 'Copy', 'Modify' and 'Transfer', which allows others not just to use your car but also to modify it or give it to someone else.
However, if you prefer to keep your creation exclusive or for personal use, you can set your car to 'No-Transfer'. This setting allows your friends to use the car but prevents them from passing it on to others. It's a way to share your work while still retaining control over who gets your creation.
To share your car with others, start by taking the car into your inventory. Once it's there, select 'Share' in the right-click menu to send it to your friends.
Customizing Your Car
Enhancing your car with additional objects can add a lot of personalities and make it stand out. You can link other objects to your car to create a unique look or add functionality. Imagine adding neon underglow lights for that cool, night-cruising vibe, or a custom spoiler that screams speed and style. How about a roof rack filled with virtual equipment for the look of an adventurer? These additions can transform your vehicle, giving it a unique look and enhanced functionality. However, when linking objects, it's important to ensure that the car remains the 'root' of the linkset. The root is the main object in a group of linked items, and in most cases, it dictates the properties (like movement) for the whole group.
To ensure your car is the root when linking, always select it last before you link. In Second Life, the last object selected before linking becomes the root. This is crucial because the root object's settings and scripts determine how the linked set behaves. If your car is the root, it will control the movement and functionality of the entire linkset, maintaining its drivability and features.
By customizing your car and choosing how to share it, you're not just creating a vehicle; you're creating an experience for yourself and others in Second Life. Whether you're fine-tuning it for the perfect drive, adding personal touches, or deciding how it's shared, these steps bring your creative vision to life in the virtual world.